A successful MVP journey is divided into three phases: Discovery and Planning, Design and Prototyping, and Development and Launch. Each phase is carefully designed to ensure your product is user-focused, technically sound, and ready for market validation.
Phase 1: Discovery and Planning (Days 1–30)
The discovery and planning phase sets the foundation for your MVP. This stage ensures that your goals are well-defined, your audience is understood, and your team is aligned on the vision.

Define the Problem
The first step in any MVP development process is identifying the core problem your product aims to solve. To do this:
- Clearly articulate the issue your target audience is facing.
- Conduct competitive research to identify gaps in existing solutions.
- Understand how your product differentiates itself.
A well-defined problem statement is the north star for your MVP development journey.
Understand Your Target Audience
An MVP that doesn’t resonate with its audience is destined to fail. Take the time to identify your users:
- Demographics: Age, income level, location, etc.
- Psychographics: Values, motivations, challenges, and behaviours.
- Market Trends: Current gaps in solutions and evolving user needs.
By developing detailed user personas, you can ensure that your MVP focuses on what matters most to your audience.
Set Clear Goals
Define measurable goals for your MVP, such as:
- Validating product-market fit.
- Gathering actionable user feedback.
- Testing core functionalities and user engagement.
Prioritize Features
Not all features are created equal. Use prioritization frameworks like Moscow(Must-Have, Should-Have, Could-Have, Won’t-Have) to identify the essential functionalities. Your MVP should include only the Must-Have features necessary to solve the core problem.
Create a Project Roadmap
Establish a clear roadmap that outlines timelines, milestones, and team responsibilities. Ensure that every team member understands their role and deliverables for the next phase.
-
Deliverables for Phase 1:
- Problem statement.
- User personas.
- MVP goals and prioritized feature list.
- Detailed project roadmap.
Need help with planning your MVP?
Contact us for a free consultation to create a tailored roadmap for your idea.
Phase 2: Design and Prototyping (Days 31–60)
With the planning phase complete, it’s time to bring your idea to life visually. This phase focuses on user experience (UX), design, and usability testing.

Wireframing
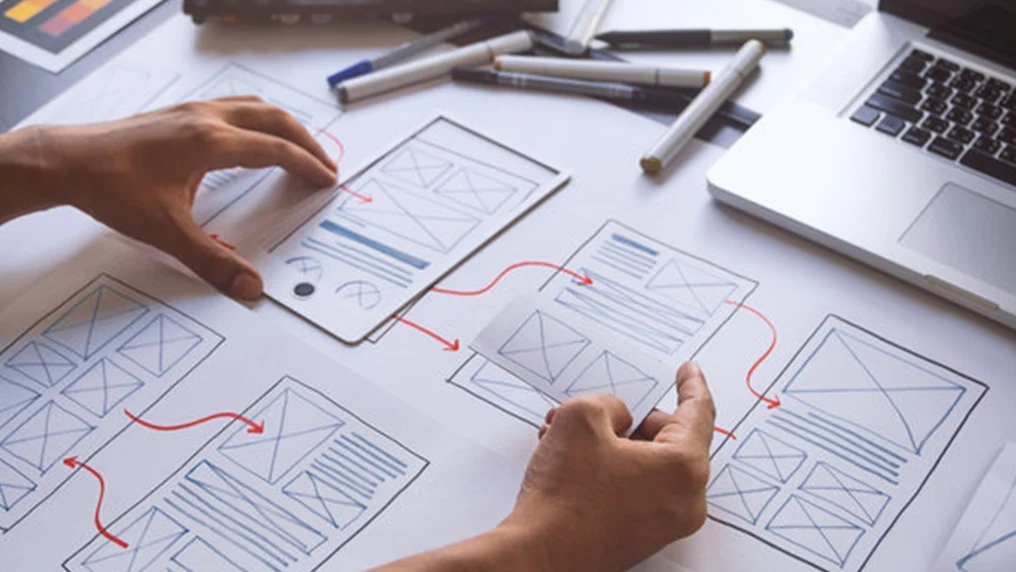
Begin by creating wireframes that outline the structure of your MVP. These basic sketches:
- Visualize the product layout.
- Highlight the flow between different features and screens.
- Provide a foundation for high-fidelity designs.
Build High-Fidelity Mockups
Use tools like Figma, Adobe XD, or Sketch to create high-fidelity mockups. These designs should:
- Represent the final user interface (UI).
- Be visually appealing and user-friendly.
- Incorporate branding elements where applicable.
Develop a Clickable Prototype
A clickable prototype allows stakeholders to interact with your MVP. This prototype helps you:
- Simulate the functionality of your product.
- Gather feedback from stakeholders and potential users.
- Refine the design before development begins.
Conduct User Testing
Test your prototype with real users to identify pain points and areas for improvement. Focus on:
- Navigation and usability.
- Clarity of features.
- Overall experience.
The insights gathered during testing will ensure your MVP is aligned with user expectations.
Finalize the Design
Incorporate user feedback into the prototype and finalize the design for development. Ensure that all visual elements and user flows are optimized for simplicity and functionality.
-
Deliverables for Phase 2:
- High-fidelity prototype.
- User testing report.
- Finalized design files for development.
Looking for professional design support?
Book a free design consultation with our experts today.
Phase 3: Development and Launch (Days 61–90)
The final phase focuses on turning your prototype into a working product and preparing it for launch.

Choose the Right Tech Stack
Select technologies that are scalable, cost-effective, and aligned with your product’s goals. Common choices include:
- Front-End Tools: React, Angular, or Vue.js.
- Back-End Tools: Node.js, Ruby on Rails, or Python (Django).
- Hosting Platforms: AWS, Google Cloud, or Microsoft Azure.
Agile Development
Divide the development process into 1-2 week sprints. Focus on:
- Building core functionalities identified in Phase 1.
- Testing each module for performance and reliability.
- Continuous integration to ensure smooth progress.
Quality Assurance (QA) Testing
Conduct thorough QA testing to address:
- Functional issues.
- Cross-device and cross-browser compatibility.
- Data security and compliance.
Launch Your MVP
Prepare for launch with a robust go-to-market plan:
- Marketing: Create campaigns targeting early adopters.
- Deployment: Ensure seamless integration into your hosting platform.
- Support: Set up a dedicated team to handle post-launch issues and gather feedback.
Monitor and Iterate
Track your MVP’s performance using analytics tools like Google Analytics or Mixpanel. Focus on key metrics such as:
- User retention.
- Engagement with core features.
- Conversion rates.
-
Deliverables for Phase 2:
- High-fidelity prototype.
- User testing report.
- Finalized design files for development.
Ready to launch your MVP?
Schedule a call with our team today to get started.
Best Practices for MVP Development
- Focus on Feedback: Use user insights to guide future development.
- Engage Early Adopters: Build a loyal user base by solving their most pressing problems.
- Measure Success: Track KPIs like retention, engagement, and revenue to evaluate your MVP’s performance.
- Plan for Growth: Build a scalable foundation to support future iterations.
Common Pitfalls to Avoid
- Feature Overload: Keep your MVP focused on core functionalities.
- Skipping Testing: Early user feedback is critical for identifying pain points.
- Ignoring Scalability: Plan for growth to avoid technical debt.
Conclusion: Bring Your Vision to Life
Creating an MVP is more than just a development project—it’s a journey of discovery, validation, and growth. By following this 90-day plan, you can streamline the process, minimize risks, and bring a product to market that resonates with your target audience.
Whether you’re a startup founder or an established business, our team of MVP experts can help you at every stage of the journey. From defining your vision to launching your product, we provide the expertise you need to succeed.
Ready to turn your idea into reality?
Contact us for a free consultation and let’s start building your MVP today.


